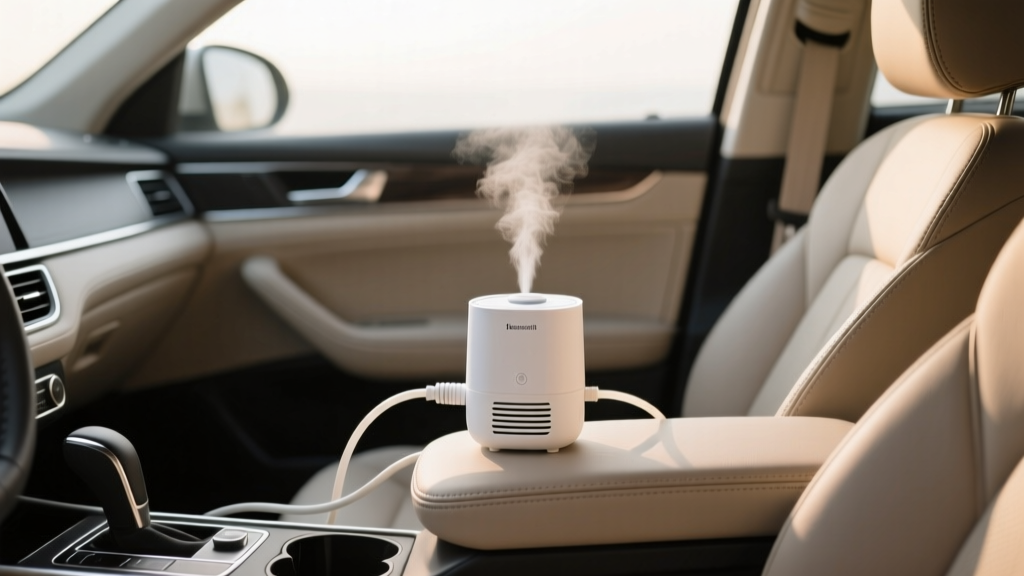
DIY Dehumidifier Setup Replacement Tutorial - CarInteriorMix
A damp car interior isn?t just uncomfortable?it can quietly ruin your cabin. Foggy windows that won?t clear, a musty smell that returns after every rainstorm, and carpets that never fully dry are all signs moisture is hanging around longer than it should. Left alone, that moisture can lead to mold growth, corrosion on electrical connectors under the seats, and stained headliners or carpets that are tough (and expensive) to restore.
The good news: you don?t always need a shop appointment to take control of cabin humidity. Whether you?re replacing old desiccant packs, upgrading your reusable dehumidifier setup, or building a smarter moisture-management routine for your daily driver, this guide walks you through a reliable DIY replacement process. You?ll also learn what to avoid so you don?t trap moisture, create leaks, or overload your car?s electrical system with the wrong device.
This tutorial is written for real car owners?people who park outside, commute in wet weather, transport kids and pets, or store a vehicle seasonally. If you?ve ever noticed condensation inside your car after a cold night or a soggy floor mat after a storm, this is for you.
What ?Dehumidifier Setup Replacement? Means in a Car
Unlike homes, cars don?t typically have built-in dehumidifiers you ?swap out? like a furnace filter. When car owners talk about a dehumidifier setup, they usually mean one (or a mix) of these approaches:
- Passive desiccant dehumidifiers (silica gel, calcium chloride, or activated charcoal moisture absorbers) placed in the cabin.
- Rechargeable dehumidifier bags that you dry out and reuse.
- Small electric dehumidifiers (usually for parked vehicles, RVs, or garages; sometimes used in cars with caution).
- HVAC moisture control (using the A/C correctly, replacing the cabin air filter, or addressing clogged drains and leaks).
This article focuses on replacing and upgrading a DIY cabin dehumidifier setup (passive or rechargeable) while also covering key checks that keep humidity from returning.
Before You Replace Anything: Diagnose Why Your Car Is Damp
A dehumidifier helps manage symptoms, but if water is actively entering the cabin, you?ll be refilling moisture absorbers nonstop. Spend 10?20 minutes checking these common sources:
Quick moisture-source checklist
- Wet carpets (especially the passenger footwell): may indicate a blocked A/C evaporator drain or windshield leak.
- Musty odor after A/C use: can point to evaporator moisture and bacteria buildup.
- Fogging that returns quickly: may indicate high humidity trapped inside, a saturated cabin filter, or heater core issues.
- Water in spare tire well/trunk: common with tail light gasket leaks or hatch seals.
- Sunroof drains: clogged drains can spill water into headliner and pillars.
Real-world example
If your windows fog heavily every morning and your floor mats feel damp, a desiccant bag will help?but you?ll get better results after you remove the soaked mats, dry the carpet, and confirm your A/C drain isn?t plugged. Otherwise, you?re fighting a constant incoming water supply.
Tools and Supplies You?ll Want
You can replace most car dehumidifier setups with minimal gear. Gather:
- Nitrile gloves (especially if handling calcium chloride products)
- Microfiber towels and a small trash bag
- Moisture absorbers (new packs, rechargeable bag, or container-based unit)
- Optional: hygrometer (small digital humidity gauge) for monitoring
- Optional: baking sheet (to recharge silica-based bags in an oven, if allowed by the manufacturer)
- Optional: small vacuum for damp carpet debris
Choosing the Right Replacement: Product Types Compared
Not all moisture absorbers behave the same. Here?s a practical comparison so you can replace your setup with something that matches your driving habits and climate.
1) Rechargeable silica gel dehumidifier bags
- Best for: daily drivers, moderate humidity, preventing recurring fogging
- Pros: reusable, tidy, usually non-dripping
- Cons: needs recharging periodically (oven, microwave, or built-in indicator depending on model)
- Where to place: under front seats, center console area, or trunk
2) Calcium chloride ?bucket? or hanging moisture absorbers
- Best for: parked vehicles, seasonal storage, very damp conditions
- Pros: pulls a lot of moisture quickly
- Cons: can produce liquid brine; spills can stain carpet and corrode metal
- Where to place: flat, stable area (preferably in a tray) away from upholstery and electronics
3) Activated charcoal odor/moisture bags
- Best for: odor control and mild moisture
- Pros: helps musty smells, low mess
- Cons: limited moisture capacity compared with silica/calcium chloride
4) Small electric dehumidifiers (use with caution)
- Best for: garages, enclosed storage spaces, or vehicles with shore power
- Pros: continuous moisture removal (when powered safely)
- Cons: power draw, condensation management, not ideal for running off a car battery
Recommendation shortcuts
- Most owners: start with rechargeable silica gel bags + good HVAC habits.
- Very wet climate or long storage: use calcium chloride but protect against spills.
- Musty smell with light condensation: add charcoal as a secondary helper.
Step-by-Step: Replace Your DIY Car Dehumidifier Setup
Step 1: Remove the old units and check for leaks
- Put on gloves and remove the old dehumidifier packs/containers.
- If you used calcium chloride, keep the unit upright and place it in a trash bag immediately.
- Inspect the area beneath it for dampness or residue. Wipe clean with a slightly damp microfiber, then dry.
- Check nearby carpet, under-seat wiring, and seat rails for corrosion or wet spots.
Tip: If you find a damp patch directly under a moisture absorber, it may be normal condensation?or it may be a slow spill. Treat that as a warning sign and switch to a non-drip silica option.
Step 2: Dry the cabin so the new setup isn?t overwhelmed
- Remove and dry floor mats outside the vehicle.
- If carpet is damp, blot with towels and vacuum any debris.
- On a dry day, park in sunlight with windows cracked for 10?20 minutes (supervised).
- Run the A/C with the heat on for a short drive to pull moisture from cabin air and evaporator surfaces.
Real-world tip: A quick 15-minute drive with A/C on (even in winter) can dramatically reduce fogging the next morning because A/C removes moisture from the air before it hits your glass.
Step 3: Replace or recharge your moisture absorbers
If you?re using rechargeable silica bags
- Check the indicator (if your bag has one) for saturation.
- Recharge exactly as the manufacturer states?many use low oven heat; some are microwave-safe; some are not.
- Let it cool completely before placing it back in the car.
If you?re using calcium chloride units
- Dispose of old units per local guidelines (avoid dumping brine on driveways or lawns).
- Install the new unit inside a secondary spill tray or a shallow plastic bin.
- Confirm it?s stable and won?t tip during braking or cornering.
If you?re using charcoal bags
- Replace if they?re old and no longer effective.
- Some charcoal bags can be refreshed by placing in sunlight?follow the label guidance.
Step 4: Place the dehumidifiers in the best locations
Placement matters more than many people think. You want airflow exposure without risking spills.
- Under front seats: great for silica or charcoal bags; keep away from seat tracks and wiring harnesses.
- Rear footwells: helpful if passengers track in snow/rain.
- Trunk/spare tire well: ideal for moisture-prone storage areas.
- Dashboard: avoid large units that can become projectiles; small anti-fog silica pouches are safer.
Safety note: Do not place any container that can spill liquid where it could contact seat airbag wiring, amplifier modules, or under-seat electronics.
Step 5: Add a simple humidity monitoring routine
A $10?$20 mini hygrometer can help you confirm the setup is working.
- Target range: roughly 40?60% relative humidity inside the cabin when parked (varies by climate).
- If you?re constantly above 70%: you likely have an active leak or soaked insulation that needs drying.
HVAC Upgrades That Make Your Dehumidifier Work Better
Your car?s A/C system is the most effective dehumidifier you already own. Pair your DIY setup with these maintenance items:
Replace the cabin air filter
- A clogged, damp cabin filter reduces airflow and can hold moisture and odor.
- If your filter smells musty or looks dark and swollen, replace it.
- Consider a charcoal-activated cabin filter if odor is a recurring issue.
Use ?A/C + defrost? correctly
- Defrost mode often runs the A/C automatically?this dries the air before it hits the windshield.
- For fast clearing: set fresh air (not recirculation) and moderate fan speed.
Check the A/C evaporator drain
- If you see water on the passenger floor, the drain may be clogged and dumping condensate inside.
- On many cars, the drain exits under the vehicle near the firewall. You should see water dripping under the car when A/C has been running.
Common Mistakes to Avoid
- Using calcium chloride without spill protection: brine can permanently stain carpet and accelerate corrosion.
- Placing dehumidifiers where they can become projectiles: unsecured containers on the dash or seat can be dangerous in a crash.
- Ignoring wet insulation under carpet: the top surface may feel dry while the padding underneath stays soaked for weeks.
- Relying on recirculation all the time: it can trap humidity from passengers? breath and wet clothing.
- Trying to power an electric dehumidifier off the car battery overnight: it can drain the battery quickly and leave you stranded.
- Masking odors instead of removing moisture: fragrance products won?t fix mildew growth.
Product Recommendations (Practical Picks by Use Case)
Rather than naming a single ?best? option for every driver, here are dependable product categories that match common situations:
Daily driver in mixed weather
- 2x rechargeable silica gel dehumidifier bags (one under each front seat)
- Optional: small charcoal bag in the trunk for odor control
Outdoor parked car in rainy/humid climate
- Rechargeable silica bags + one calcium chloride unit in a spill tray (placed in the trunk or a stable footwell area)
- Upgrade: replace cabin air filter more frequently
Seasonal storage (weeks to months)
- Calcium chloride container in a secured tray + silica bag for redundancy
- Prep tip: deep-clean and dry the interior first; storing a damp car guarantees mold risk
FAQ: DIY Car Dehumidifier Setup Replacement
How often should I replace or recharge my car dehumidifier?
It depends on climate and how much water enters the cabin. Rechargeable silica bags often need recharging every 2?6 weeks in humid seasons. Calcium chloride containers may last 30?90 days but can fill faster if your car has a leak or consistently wet mats.
Why do my windows still fog even with a dehumidifier inside?
Usually because the moisture source is ongoing (wet carpet padding, clogged A/C drain, or water intrusion). Also, fogging is strongly affected by temperature swings; using A/C with defrost is often the fastest fix.
Is it safe to keep a moisture absorber in the car while driving?
Silica and charcoal bags are generally safe if they?re secured and not interfering with pedals or seat tracks. Calcium chloride units are better for parked use unless they?re very stable, double-contained, and positioned to prevent spills.
Can a dehumidifier remove mildew smell permanently?
It can reduce the damp conditions that cause mildew, but existing mildew odor may require cleaning: shampoo carpets, wipe hard surfaces, and consider replacing a contaminated cabin air filter. If odor is coming from the HVAC evaporator, an evaporator cleaner may be needed.
Will running my car?s heater dry the interior?
Heat alone can help evaporate moisture, but it doesn?t remove it unless you ventilate or use A/C. The most effective combo is A/C on + warm air + fresh air mode, which dries the air and pushes moisture out.
What?s the best place to put a hygrometer in the car?
Place it around center-cabin height (like a cup holder or center console area) for a representative reading. Avoid direct sun exposure, which can skew readings.
Actionable Next Steps
- Pull your floor mats, check for damp carpet, and fix any obvious water intrusion.
- Replace your old moisture absorbers with a setup that matches your climate (silica for most people, calcium chloride for heavy moisture?carefully contained).
- Replace the cabin air filter and use A/C + defrost strategically to keep humidity down.
- Add a small hygrometer so you can track whether your cabin is actually drying out.
If you want more practical cabin-care walkthroughs?odor removal, carpet drying, anti-fog strategies, and interior detailing routines?explore the latest guides on carinteriormix.com.